
This guide is designed to introduce the importance of time periods and how to set these in your Talis Courseflow tenancy.
Introduction
Are you asking any of the following questions?
- How do we ensure that students are using the current resource list?
- How do we keep a copy of the previous year's lists?
- How do we reassure students that the resources they are using are current?
- How do I know the start and end dates for a digitisation request?
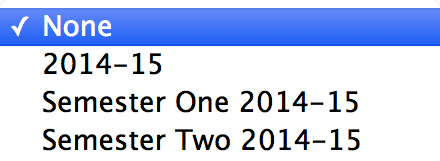
Assigning a time period to a list allows you to tag a list with a pre-defined label (for example, Summer Term 24/25). So that everyone uses the same terminology, a taxonomy of labels is defined at the tenancy level. When creating a list, or editing the header of an existing list, the user simply chooses a label from a dropdown.
 Another way to think about time periods is as the breakdown of your academic year - this may be semester, term, session. You can also have a broader time period for the entire academic year.
Time periods appear in several places within a list:
- They are in the list outline view
- They form part of the subheading of your resource list eg. “Introduction to Criminal Law (Semester 1, 2024/25)”
- They appear in the module/unit/course view
- They are within the My List view when seeing all your lists.
- They are used as the request start and end dates for Talis Course Reserves.
Rolling over lists to a new time period
Each year as instructors review their teaching, they may make adjustments to their resource lists - this may only be adding a book or removing some journal articles and replacing them with more current ones. An instructor has two options of how they can ensure their list is up to date:
- You may decide to perform a “bulk rollover” of the lists on your system. This allows you to move all lists in a given time period to a new time period eg. from: Semester 1, 2023/24 to Semester 1, 2024/25. This essentially does the same thing as copying the list, but allows you to do multiple lists all at once. Your instructors can then make the changes to their list being confident that it is the current version. At the point of rollover you can decide whether you want your lists to be auto-published or left in draft. You can also select to archive the old copies so that only the current list is available to students. You can perform this as many times as necessary throughout an academic year.
- They can choose to use the Copy function and make a duplicate of the list, amending the time period and making changes resulting in new students having the most up to date list.
How do I configure time periods?
Simply raise a support ticket and the Services Team will set up your time periods for you. Just include the following information:
- Time period name, e.g. Semester One, 2024/25
- Time period start date, e.g. 1st September, 2024
- Time period end date, e.g. 31st August, 2025
- Time period 'slug'. This should be a URL safe string such as
24-25orsem1that will be used to match time periods when using LTI or when using the List Linking API.
When identifying your new time periods, there are pros and cons for having a single time period or splitting your year into multiple time periods:
| Pros | Cons | |
|---|---|---|
| Single time period |
|
|
| Multiple time periods |
|
|
Useful tip for time periods
When adding your time periods for the next academic year, you can also choose to have the old time periods removed from the drop down box, after rollover. This makes sure lists are only attached to the current years time periods. You will still see all time periods in the reports, it is just when creating the list that will only display the current dates.